Showing posts with label silhouette. Show all posts

Nov 27, 2014

50/50 Silhouettes II


These 50/50 silhouettes from year 5 are more graphic than fine art. I think a lot of graphic art often appears deceptively simple. I showed these students the same lesson as undertaken by a previous class who I first tried this lesson with (it's over here). Quite a few of these students took direct inspiration from my previous class, while others found their own ideas.

We drew in pencil and then painted all the black parts in acrylic. Once dry, I decided to add a step this time and paint the white/negative space a single colour of their choosing. We used watercolour paint for that final step – much quicker to work with and far easier to clean up : )


Jul 28, 2014

Symmetrical Silhouettes


Year 4 were working on these stylised trees for a short time at the end of each maths class. Unfortunately only a few were completed in the time I was with them — I hope to see more of them fully realised when I get a chance to visit their class again.

Using grid paper printed from this very handy site, I asked the students to make a stylised but symmetrical tree. Working from the bottom and centre, they began by drawing in pencil, then traced this with black markers before finishing with brightly coloured backgrounds of their choosing. 

Most students only seem to enjoy this type of detailed art for a short time, so just doing a little bit each day seemed to work well. As you can see, some of the trees are very stylised — I'm not sure how many were secretly drawing something else... but at least they were busy! 


Jan 25, 2014

Black Trees


These year 2 students painted their black trees (silhouettes) straight on the paper without pencil planning first. They also painted from their own mind, realistic or stylised, whatever they preferred. I did  a few sketches on the board, but there were no photos or artworks to copy (partly because I didn't have any on hand, but also because it's good for them to come up with their own shapes).

They were asked to touch all four edges of the page with their tree. Later in the day they returned and filled in the spaces with colours, again whichever and wherever they wanted. The effect is a bit like stained glass. Probably a little similar to the last post… The chance for this lesson came up on the day and it happened as I thought of it! But I'm sure I've previously seen similar lessons online, here's one by Marcia from Art Is Basic.


Jan 13, 2013

Bridge Silhouettes


These bridge silhouettes were created with a year 6 class. I had this class in their final weeks of primary school, so there was not a lot of ongoing work and we were able to finish these within the one day I was there. It was an idea I'd been thinking about and looking forward to trying for a good while. In fact I told the class how excited I was and that I had even been “dreaming of this lesson”, which made a few students laugh out loud!


The students sketched their bridge and horizon line in pencil and then traced their outline with permanent marker. They were asked to draw their bridge front-on, in 2 dimensions, with strong lines and ideally without too many intricate details. Next, they used watercolours to complete both the sky and water. I left this open to their interpretation but the example I prepared was of a sunset (sans actual sun). With the permanent marker down they were able to cover the entire paper with their watercolours and still see the bridge outline through the paint. 

The final step was to help their bridge structures really stand out. Once the watercolours were dry (or mostly dry) they retraced their bridge outline, but this time with regular black acrylic paint. With regular classroom quality brushes this step was the main reason I asked that they keep their bridge construction from being too elaborate. It's hard to paint thin lines with not-so-thin brushes! The students did a great job and I really like the variety of approaches across the class.


Dec 2, 2012

Contour Silhouettes


Single colour silhouettes with close contour lines repeated to fill all the surrounding negative space. They look extra good altogether on the classroom wall. An exercise in patience with a paintbrush. And who would've known I could be so succinct!


Oct 7, 2012

Primary Silhouettes


Yes, I'm still experimenting with silhouettes! These were created by a year four class. I asked them to make a large outline of their chosen object in pencil and then had them rule their own background stripes using dimensions written on the board. Using regular acrylic paint, the students painted their silhouettes and the stripes in primary colours, leaving one white. Each student decided which colour should go where. The paints were wet on the paper so I was pretty impressed by how well they controlled their brushes.


We briefly discussed how some famous artists and artworks were renowned for utilising the three primary colours plus black and white. From memory I only talked about Mondrian although Lichtenstein is another good example. Please feel free to let me know of any other artists who have used this sort of primary colourway.


Aug 12, 2012

50/50 Silhouettes


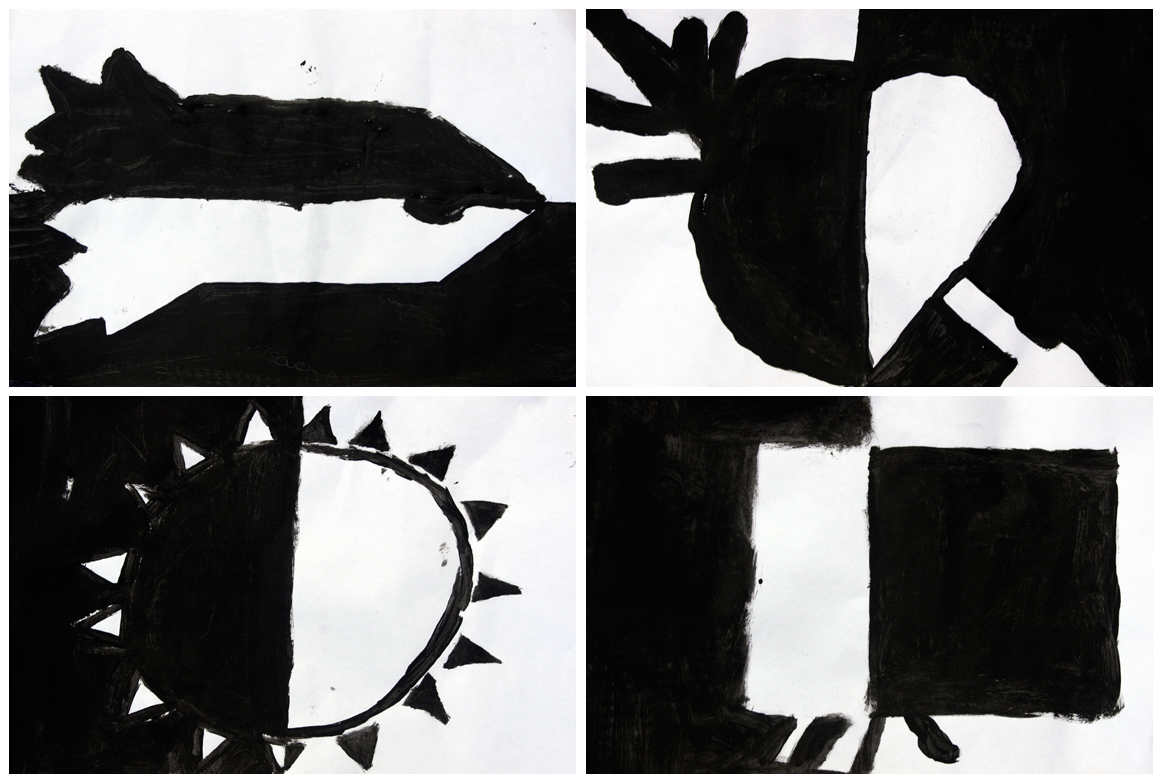
I've been trying a number of silhouette-based lesson ideas lately. I think they are effective in demonstrating how much can be communicated quickly with a simple blocked-in outline. Although a silhouette may be simplistic and stylised, even at a glance there is no mistaking a person, tree, car etc. These silhouettes were created by a year 5 class in about an hour. 

As with all my posts so far, I have included the art of every student, whatever the result — to give the best impression of how successful a lesson is. Every class will have at least one, if not a number of students who will create something special no matter what we say or do as teachers. So only showing the most adept students' work is probably not a true indication of how well a lesson works in a classroom setting.


To begin my first attempt at this lesson we briefly discussed and viewed some common silhouettes. Next I demonstrated the task of sketching a large silhouette and dividing it in two. One half was painted black, leaving a white background and then the other half of the silhouette is left white with a painted black background. The children planned their work on some scrap paper before penciling their outline onto the art paper and then moved to the painting table. 

I did bend my rules and allow some minor details rather than completely solid silhouettes, hence there are some facial features, windows etc. This was fine for most, but did confuse some with how to make each side opposite. I didn't insist on symmetrical silhouettes although obviously this is an option. Overall I'm really happy with the results and look forward to revisiting this idea. The students enjoyed both the process and results which for me is a pretty good indicator of a lesson's value.